You might be wondering why on earth you’d need to take encrypted screenshots, in that case here are a couple of reasons:
- The machine on which you take screenshots has different levels of classification
- Although in this case you *should* definitely review the full source, specially the crypto part
- You want to make it harder for the victim to find out what information has been captured (stolen)
- Just in case you have to transport them on an insecure medium
- Because it’s an easy way to steal information
- Because you want to keep your own screenshots safe
- Don’t generate the key pair on the same machine or save the private key on the same machine!
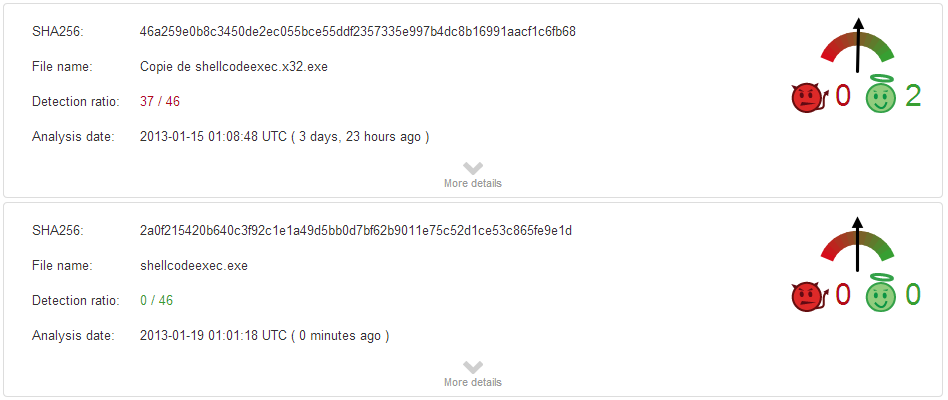
You can skip directly to ‘cryptoshot’ on my github.
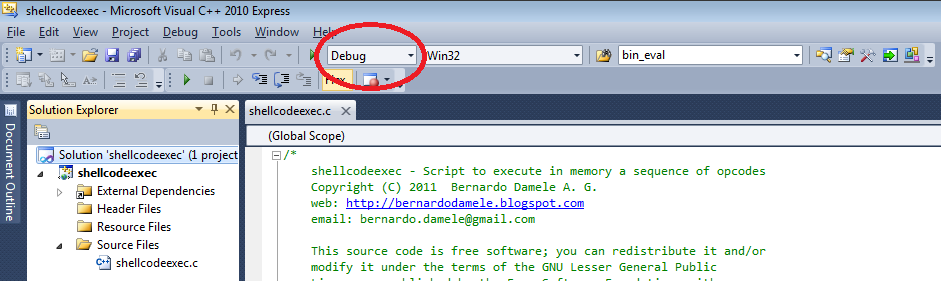
Compiling cryptoshot
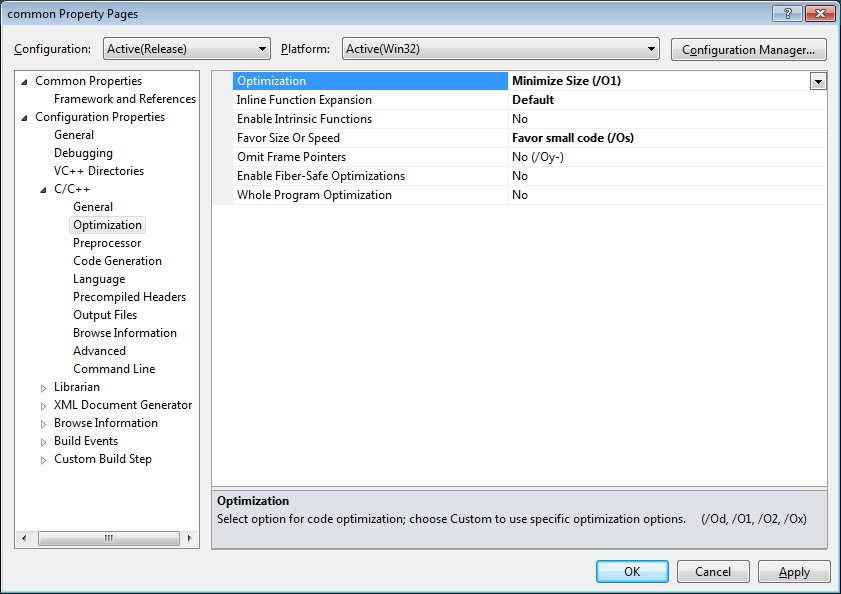
I used Visual Studio 2010 express, if you use other versions you might have to resolve possible issues yourself. It should compile without problems if you set the active configuration to ‘Release’. If you run into any problems check one of the following:
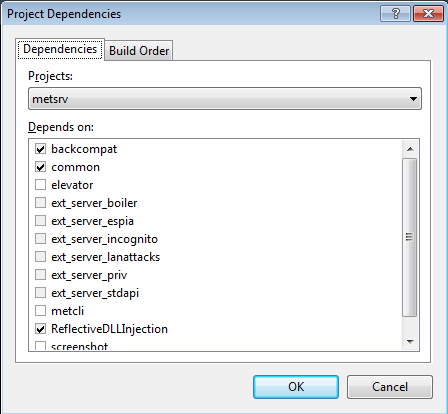
- Are the additional directories ‘libfiles’ and ‘libheaderfiles’ configured correctly under the ‘c/c++’ and linker options?
- Under ‘Linker->input’ add ‘libcmt.lib’ to the ‘Ignore Specific Default Libraries’ line
- Set ‘C/C++->Compile As’ to ‘Compile As C Code’
*UPDATE 12-12-2014* WARNING: The above probably results in a missing DLL error when running the binary, do read the comment below this post.
Things I (re)learned
Cryptography is hard, very hard
So for some odd reason I had associated Message Authentication Codes (MAC) with padding oracle attacks. Since the decryption of the screenshots would be done by another process, most probably with a huge delay in time and with no way for an attack to access the possible output, I thought why would I do a MAC over the encrypted data? Luckily for me the people in the #crypto channel on freenode where willing to explain to me that padding oracle attacks are not the only thing an attacker can do if they can ‘flip bits’ in your encrypted blob. In the case of cryptoshot for example if the attacker can guess the dimensions of the underlying image he could draw his own image. So I added an HMAC to verify before decrypting anything. Additionally for the encryption of the symmetric keys etc, I was using RSA PKCS1 and it had to be swapped for RSA OAEP. Reason being that there are multiple known attacks to PKCS1 encryption.
Multi monitors & the virtual screen
A virtual screen spans MULTLIPLE monitors! Let’s take a look at this MSDN picture:
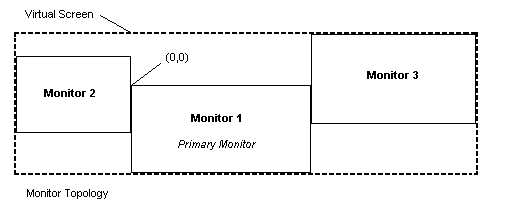
That makes it more clear doesn’t it? The virtual screen can span across multiple monitors and since the primary monitor has 0,0 as it’s origin, everything left from it is negative. So when using the BitBlt function to make a screenshot you need to make sure you distinguish between the left side position of the virtual screen (which will be negative) and the width in pixels of the virtual screen. Which more precise is the difference between using GetSystemMetrics() with SM_XVIRTUALSCREEN and SM_CXVIRTUALSCREEN.
In case you are wondering about the image format, it’s BMP. I looked into creating it as JPEG but then decided it would mean quality loss. So instead I opted to use zlib and compress the entire image before encrypting it. I was to lazy to opt for the PNG option.