This is a quick post on our adventures with binary ninja and the haySTACK challenge from this year’s CSAW 2021. On a lost evening @donnymaasland & @nebukatnetsar were playing around and said: Well this looks fun, let’s try it out with Binary Ninja.
I had totally forgotten about Binary Ninja, but boy oh boy do I still like it! Not that I forgot because I use other tools, mostly I forgot because I hardly do technical stuff nowadays. If you are not familiar with it, it is a reversing tool / framework which has a rich API if you use the native client.
The binja cloud version
The nice part is that it also include what they call “High Level IL” which basically is a decompiler that shows you ASM converted to pretty readable C like representation. The even more awesome part is that collaborating on the same binary is a breeze. You can work with multiple people in the same binary without needing to setup anything yourself, just need to make sure everyone has an account on https://cloud.binary.ninja
Let’s get started with the challenge, or more specific getting to know the cloud version of Binary Ninja by playing around with this challenge. We’ll cover some things like:
- Renaming variables
- Creating & applying enums
- Creating & applying structs
- Inviting others to collaborate
- Understanding the thought process
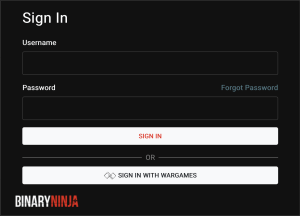
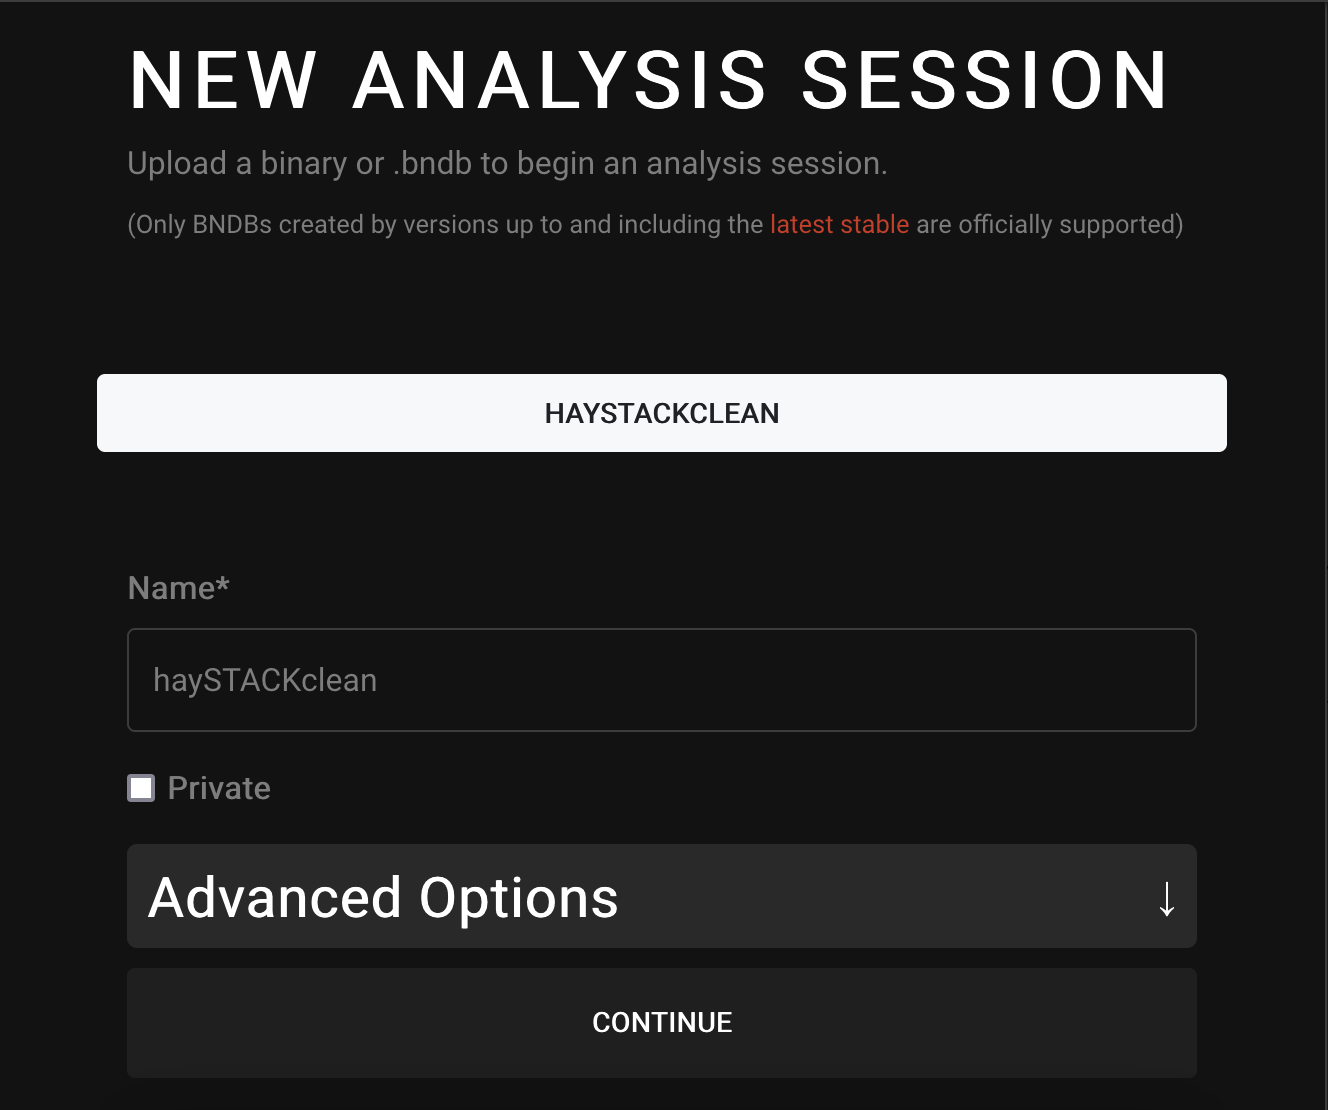
Opening up the binary in Binary Ninja (binja from now on) is as easy as hitting “New Session”, selecting the binary and then hitting continue. You can check the ‘private’ checkbox if you so desire.
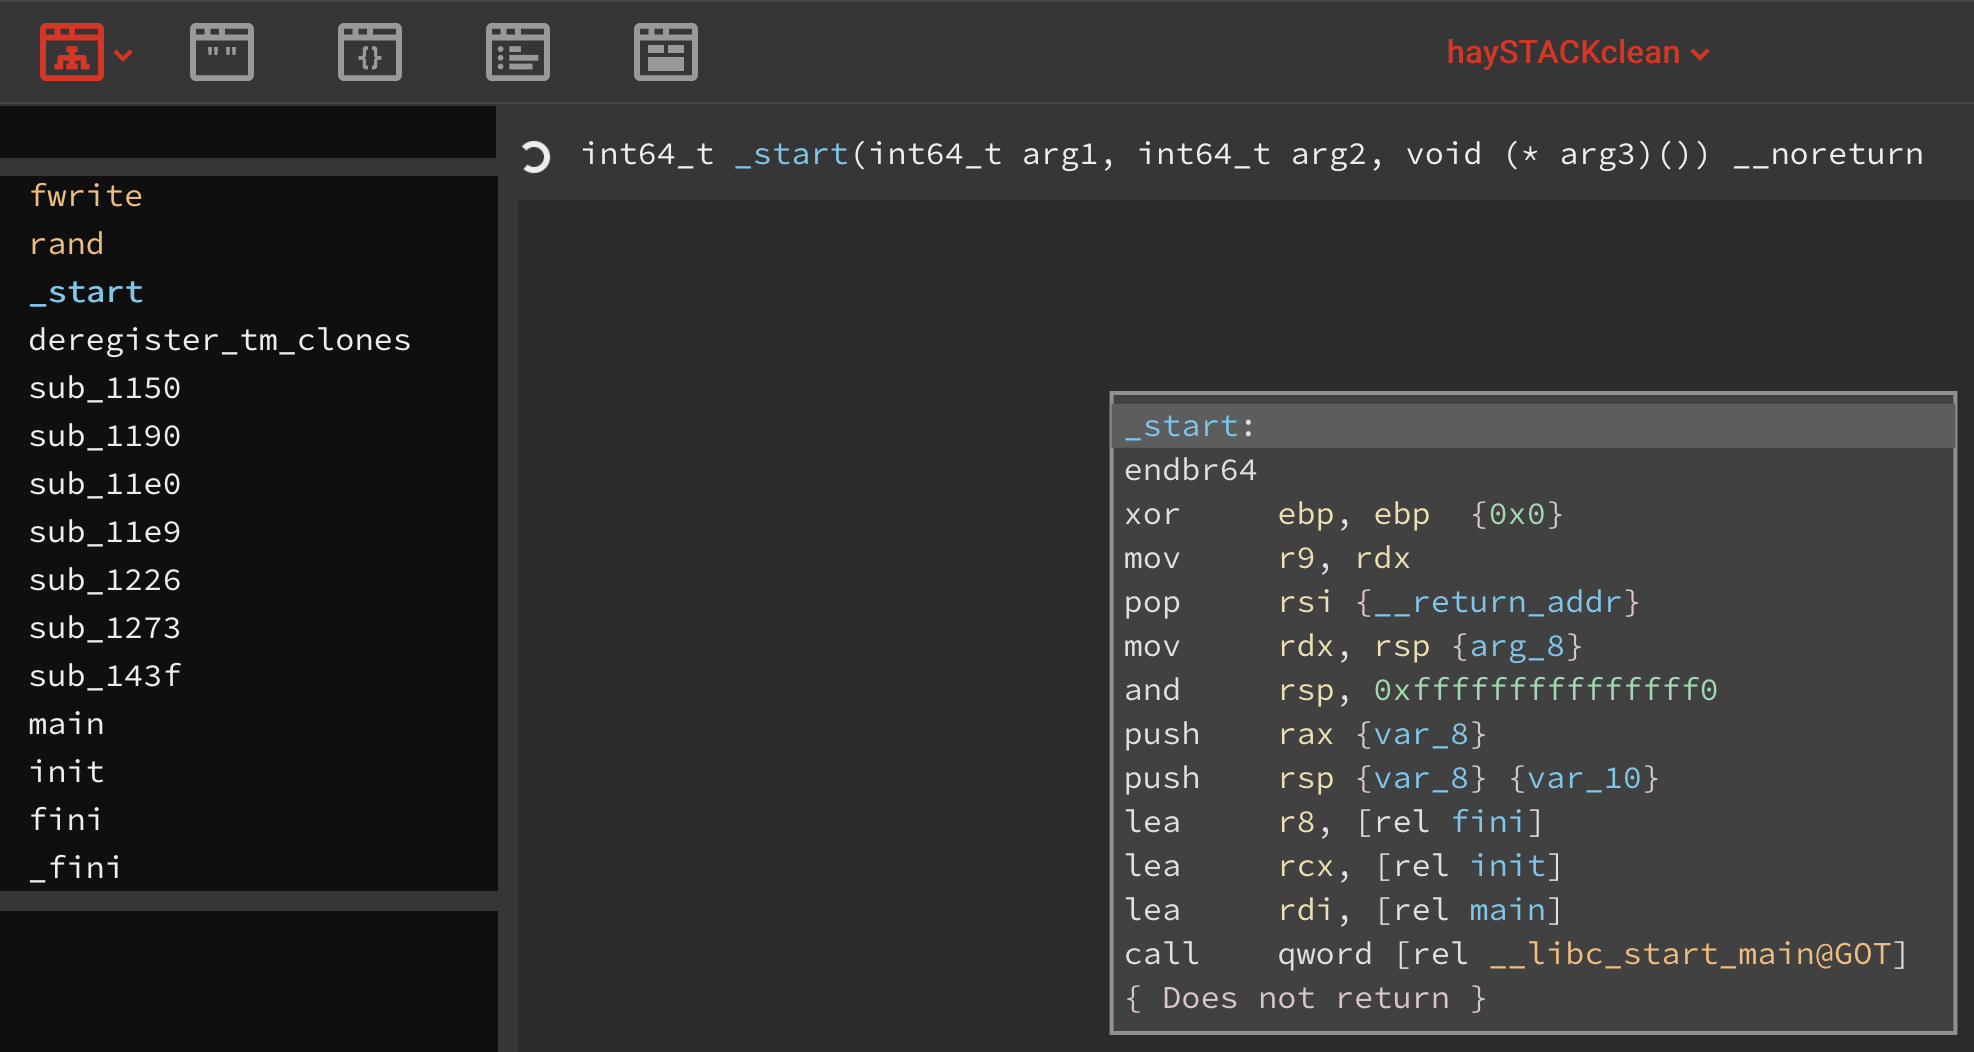
After loading the binary you are presented with the main screen and the upper left corner contains some buttons for lay-out and/or navigation:

Their documentation is pretty top notch, so they probably do a better job explaining this. What we mostly used during our fiddling around were the first and fourth button from the left to show the dissassembly OR High Level IL in either graph or linear representation. The second button from the left gives you an overview of the strings. You can swith between the Intermediate Language (IL) representation by using the ‘down’ arrow next to buttons 1 and 4.
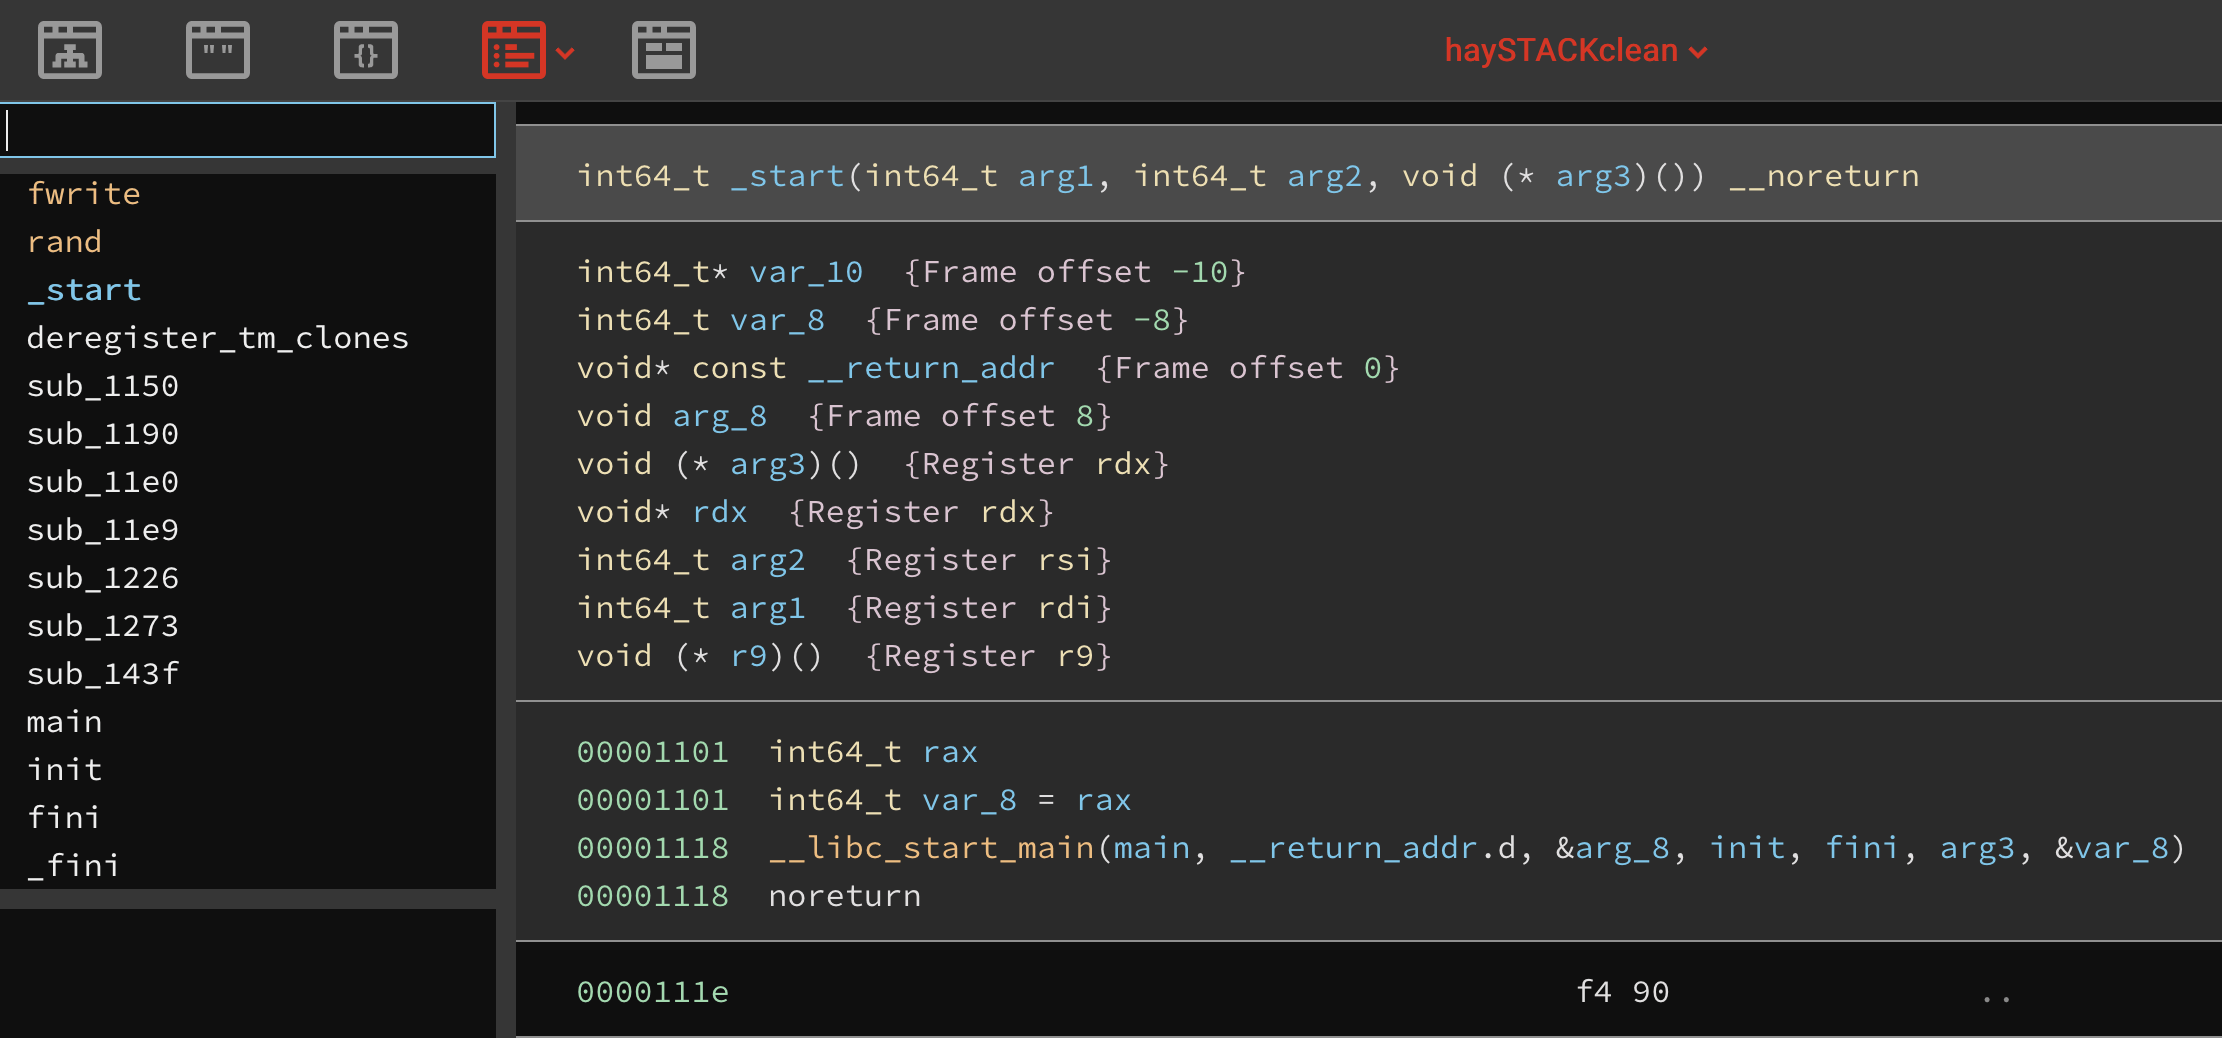
For this challenge we worked mostly in the linear High Level IL representation, it just makes life a lot easier. So where to start? With the “main” function of course, in the left side that shows you the functions scroll until you see it and double click it.
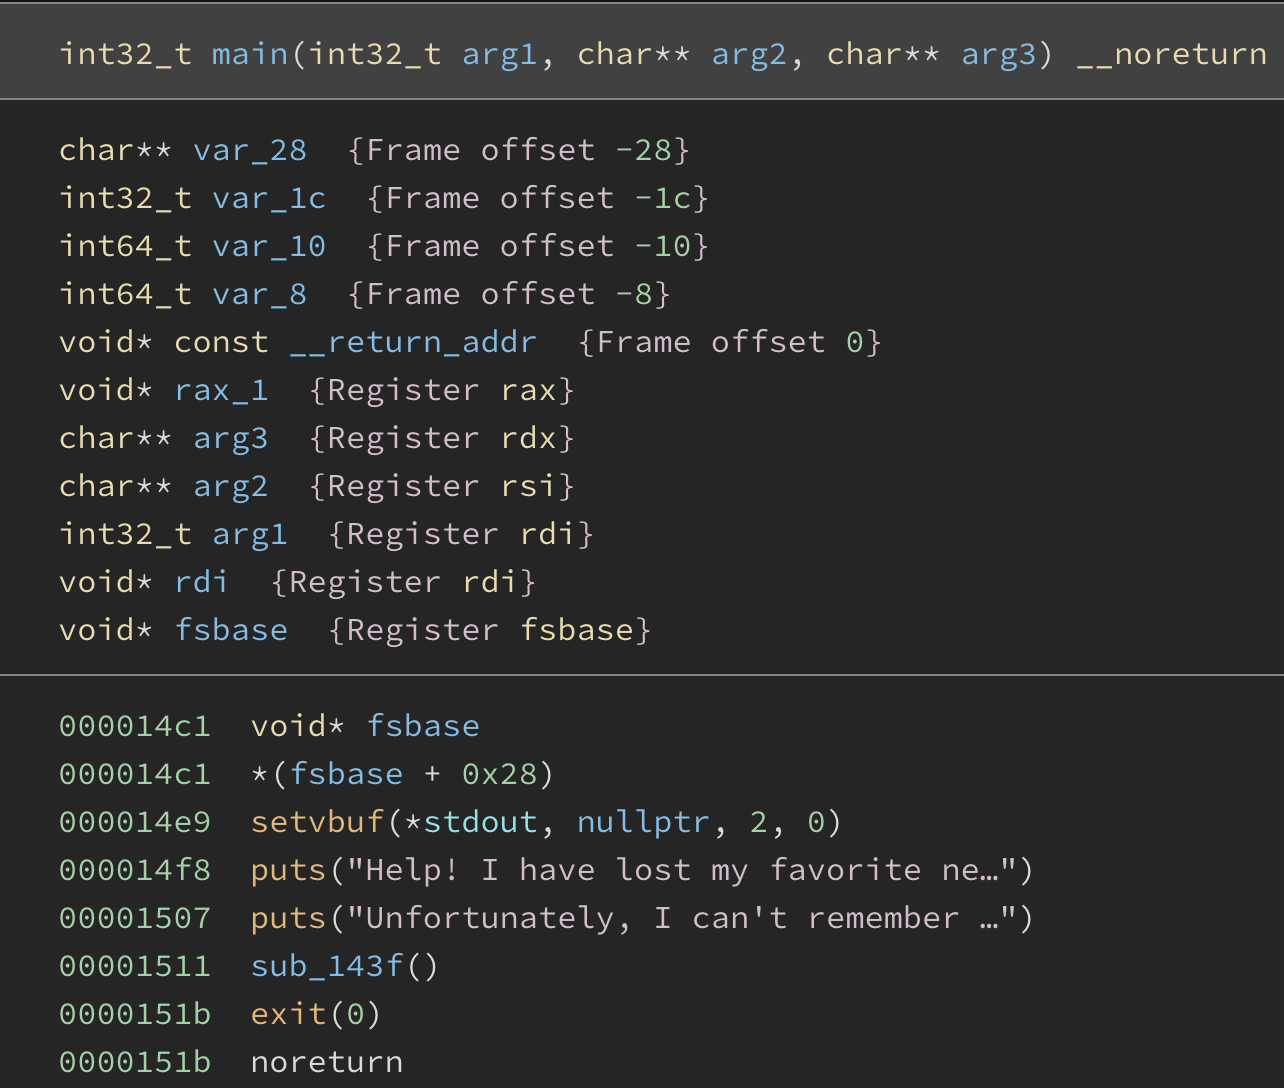
This looks familiar (if you’ve worked with other disassemblers) we can see the local variables at the top and then we see the content of the main function. For now let’s focus on the functions that we recognize:
- setvbuf = Changing the stream buffer
- puts = Print text to standard out (stdout)
- exit = Terminate the process
One of the things that took me a while to learn is that reversing is as much RENAMING as it is understanding the assembly or high level / decompiler output. So let’s make the setvbuf a bit more readable and let’s define the number 2 to what it actually is. From some online searching around we know that the number 2 indicates ‘_IOLBF’ which means ‘line buffering’. So to have binja display this we click the third layout button and then right click ‘Create New Types’ and we enter the following:
enum setvbuf_mode {_IOFBF=1,_IOLBF=2,_IONBF=3}
Then we go back to our main code and double-click on our setvbuf function and after that right click on the setvbuf function that we see and select ‘Change Type’. We then change it from this:
int32_t setvbuf(FILE* fp, char* buf, int32_t mode, size_t size)
To this:
int32_t setvbuf(FILE* fp, char* buf, setvbuf_mode mode, size_t size)
Now our main function should display ‘_IOLBF’ instead of the number 2. Which even though it is a small improvement, all these types of improvements is what makes your reversing life easier.
Now it seems that sub_143f() is the unknown function that starts our challenge, so double-click that and let’s check it out:
The beauty of renaming is that you can do it as often as you want! Trust me (even lotsa reversing books say so) renaming a function to ‘got_no_clue’ will still work better than just leaving the default name, since you’ll start to recognize code that you’ve allready visited as well as receive some context if you choose a good name. For now right-click on it and select ‘Rename Symbol’ to rename it to ‘ctfstart’.
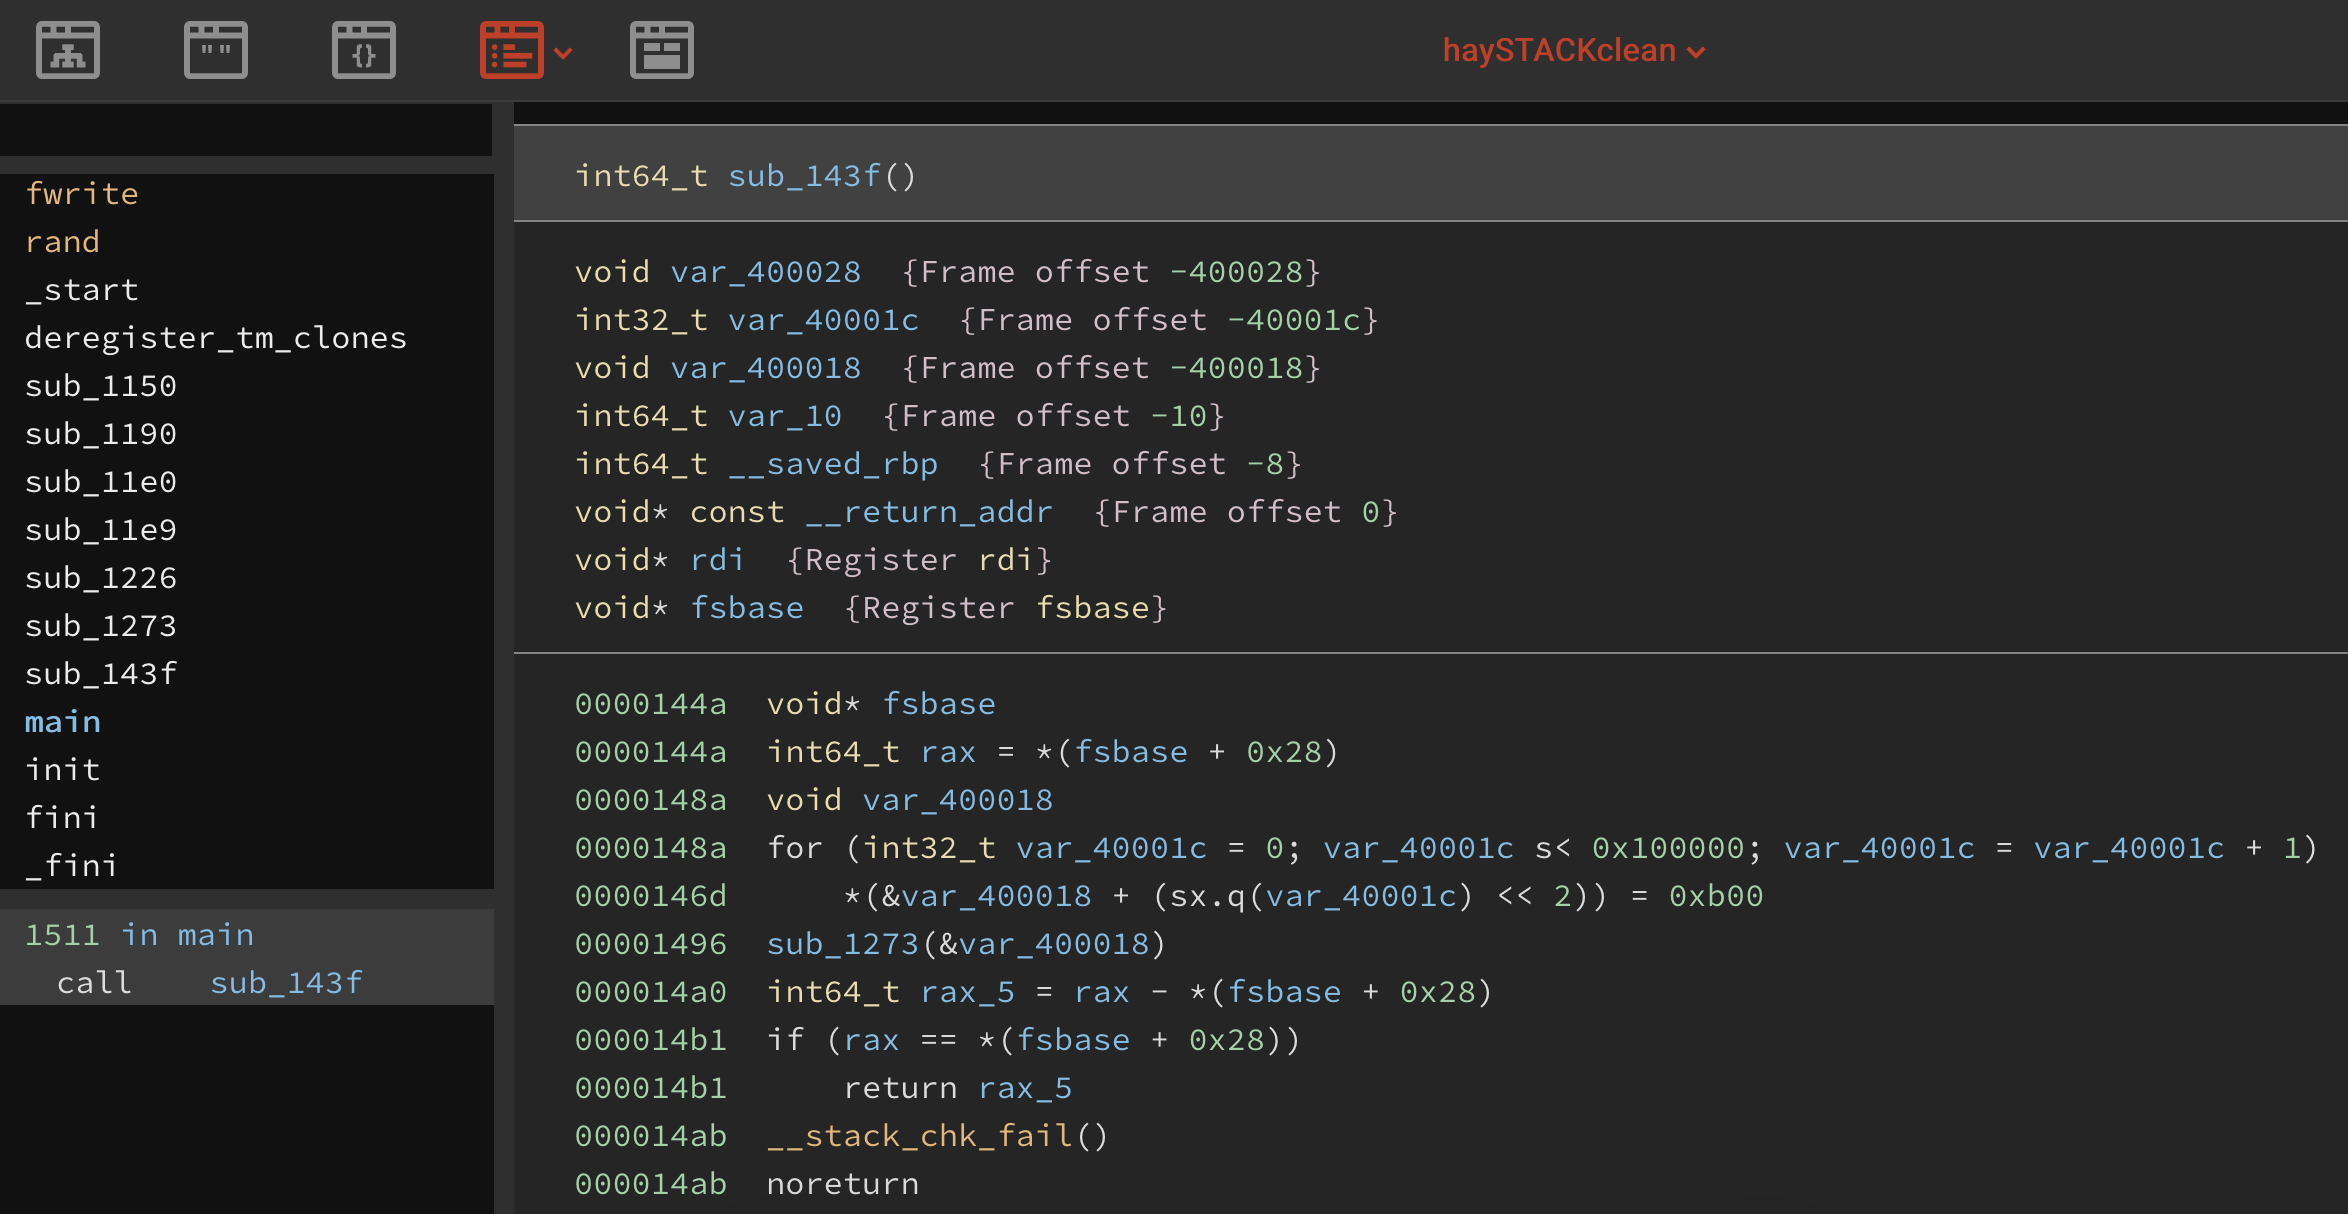
Here we again see that the function starts with the ‘fsbase’, which if we search online for it, it is the FS segment register and on position 0x28 you’ll find the stack canary. It goes beyond the scope of this post to explain the FS/Stack Canary things, but do look them up! Like before let’s make this a bit more readable then, by renaming RAX on 0x144A to ‘canary_value’. We are also going to define the right type, let’s assume we don’t know the full fsbase structure, in the types overview we then create the following new type:
struct unk_stack {
char unk[0x28];
uint64_t canary;
};
Learning to define unknown structure, took me another couple of years, but it really is incredibly useful! Specially since it cleans up the code even if you don’t know all the members yet. Then in our ctfstart() function we change the type of fsbase to:
struct unk_stack* fsbase
Making our line look like this:
uint64_t canary_value = fsbase->canary
Looking at the code we can rename ‘var_40001c’ to ‘i’ the usual name for a counter in loops. Then on 0x146D we encounter something weird where our counter is shifted ‘<<‘ to the left by two. Just do the same in your calculator, put it in programmer view enter 1 and shift it by 2 to the left etc. So shifting by two to the left is the same as multiplying by four. Now the question is why would it do this?
For this we would have to understand the type of the variable ‘var_400018’. So far we know it loops over this variable, multiplies the counter by 4 and uses that result on our variable. Since the challenge is named ‘haystack’, let’s use that as the name for ‘var_400018’. Now, what if we make an assumption? Let’s say this is an array.
I always used to wonder how people got to these assumptions, I’ve now finally come to realize it is based on experience and plain old guessing. Guess something see if it works, if not, guess again otherwise update your experience with the working guess.
So if this is an array and we loop through it normally it would look like this:
haystack[0]
haystack[1]
haystack[2]
haystack[3]
haystack[4]
However, since our counter is multiplied by 4, what the loop is actually doing:
haystack[0*4] = haystack[0]
haystack[1*4] = haystack[4]
haystack[2*4] = haystack[8]
haystack[3*4] = haystack[12]
haystack[4*4] = haystack[16]
Which would make this an array of 32bit integer values and this also gives us the size of the array when we divide 100.000/4 = 25.000! The loop sets each item in the array to the value 0xB00.
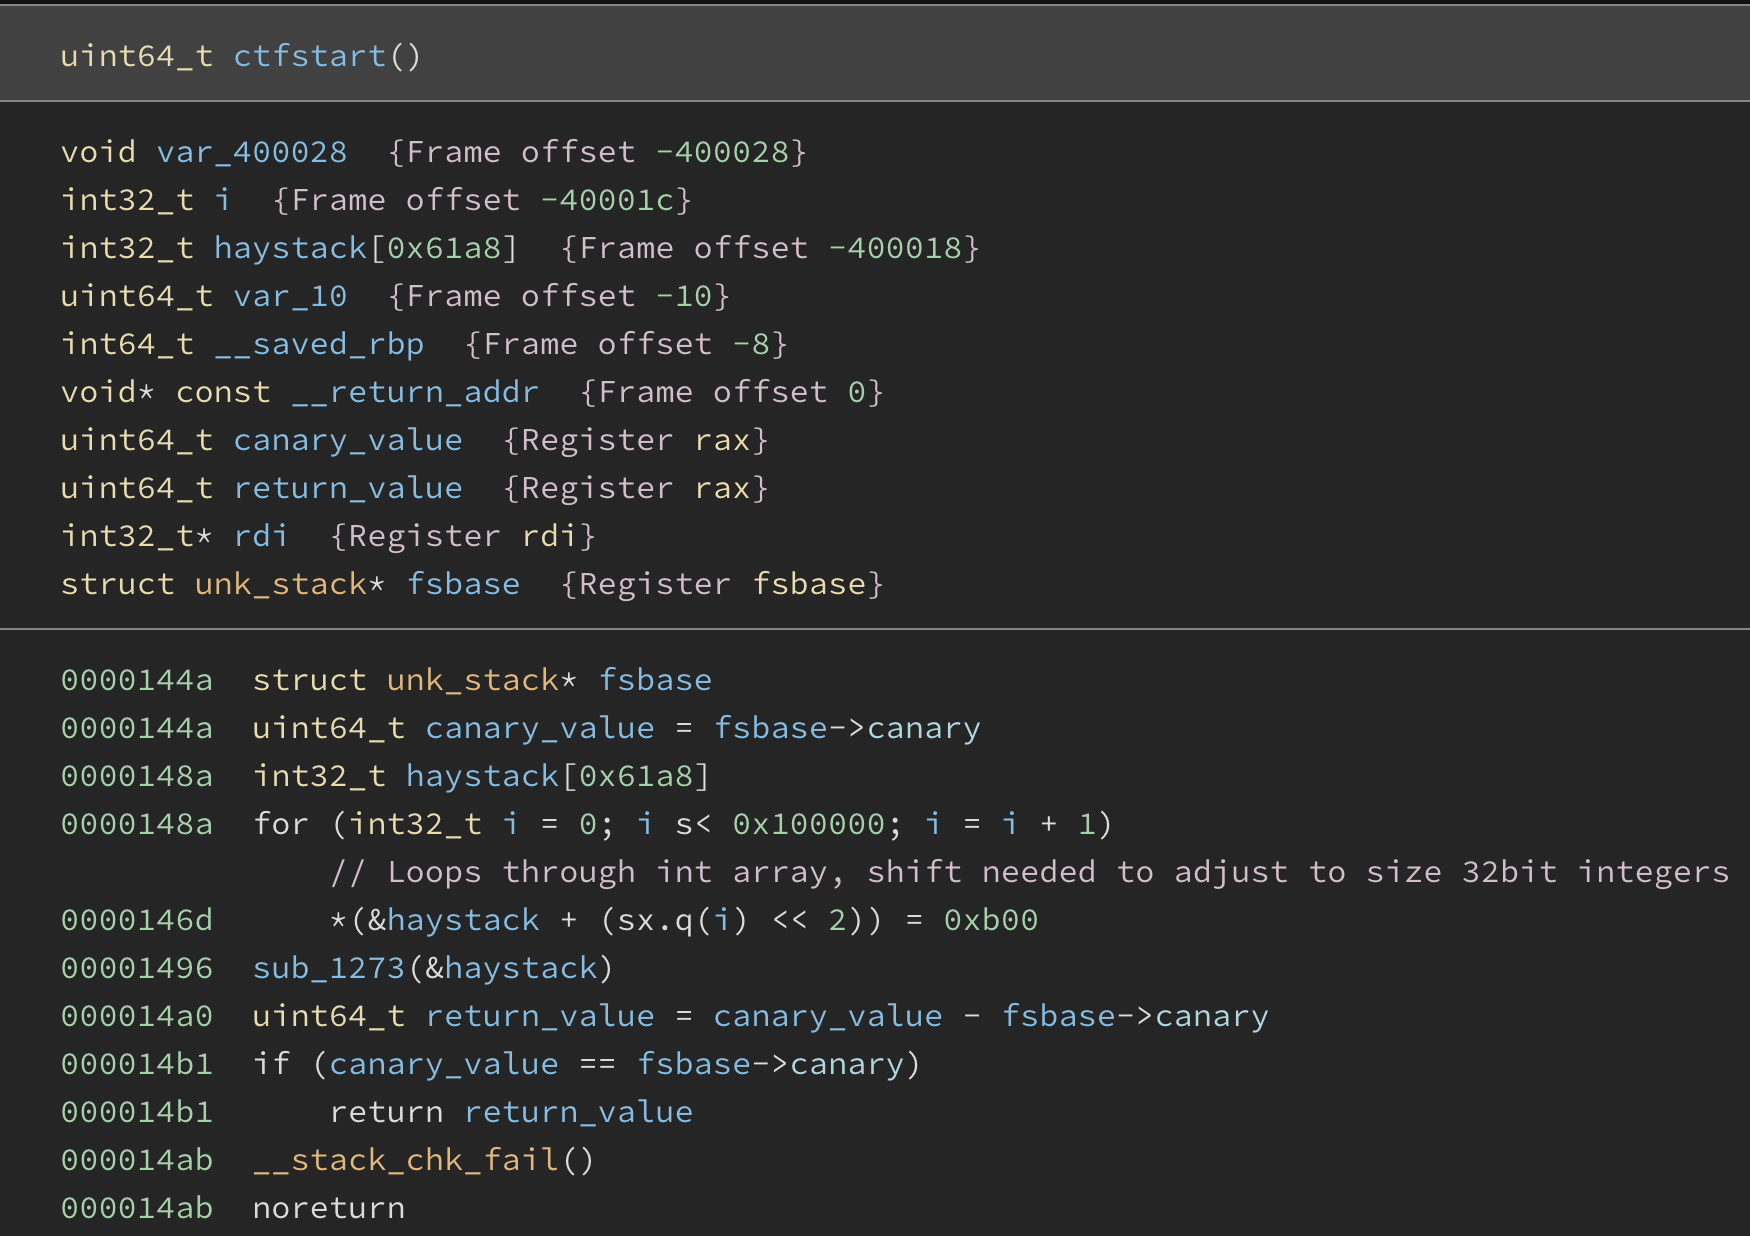
Let’s change the type to ‘int32_t haystack[25000]’. Just to be sure we also put this explanation as a comment by using ‘;’ on line 0x146D and we enter ‘Loops through int array, shift needed to adjust to size 32bit integers’ If you followed along, your code should now look like this:
I guess the next function to analyze is ‘sub_1273()’, but before we do that what if you want to invite someone to help speed up this process and collaborate on the binary together? On the top of the screen hit the down arrow on your session name and select ‘Session Settings’ then just invite the user you want to collaborate with (as long as the user has an account on binja cloud). That’s it, it really is THAT easy!
As for the function we can already rename some of the stuff that we know, just to make our lifes easier from the start. We will also change the function type (as well as the local haystack variable) from:
uint64_t sub_1273(void* arg1)
To what we now understand it to be:
uint64_t sub_1273(int haystack[])
I still don’t really understand how to force binja to show the whole offset calculations as an actual array. So for now we still have to accept the weirdness on line 0x12AF. Look at the code yourself and rename everything you think is worth renaming (don’t forget to rename the function itself and add comments as desired), it should now look something like this:

You probably noticed that on 0x1293 and 0x1396 I renamed the two functions to something with the ‘unk_’ prefix. This is a personal preference that I use to acknowledge that I’ve seen the functions, but got no clue what they do. This helps me to revisit them when I have more context. First let’s look at the unk_func_2() since that one says we found a needle! Which immediately tells us that it provides a shell, since the code is just ‘system(“/bin/sh”)’, thus we rename this to ‘winner_shell’. Now let’s look at the unk_fun_1:
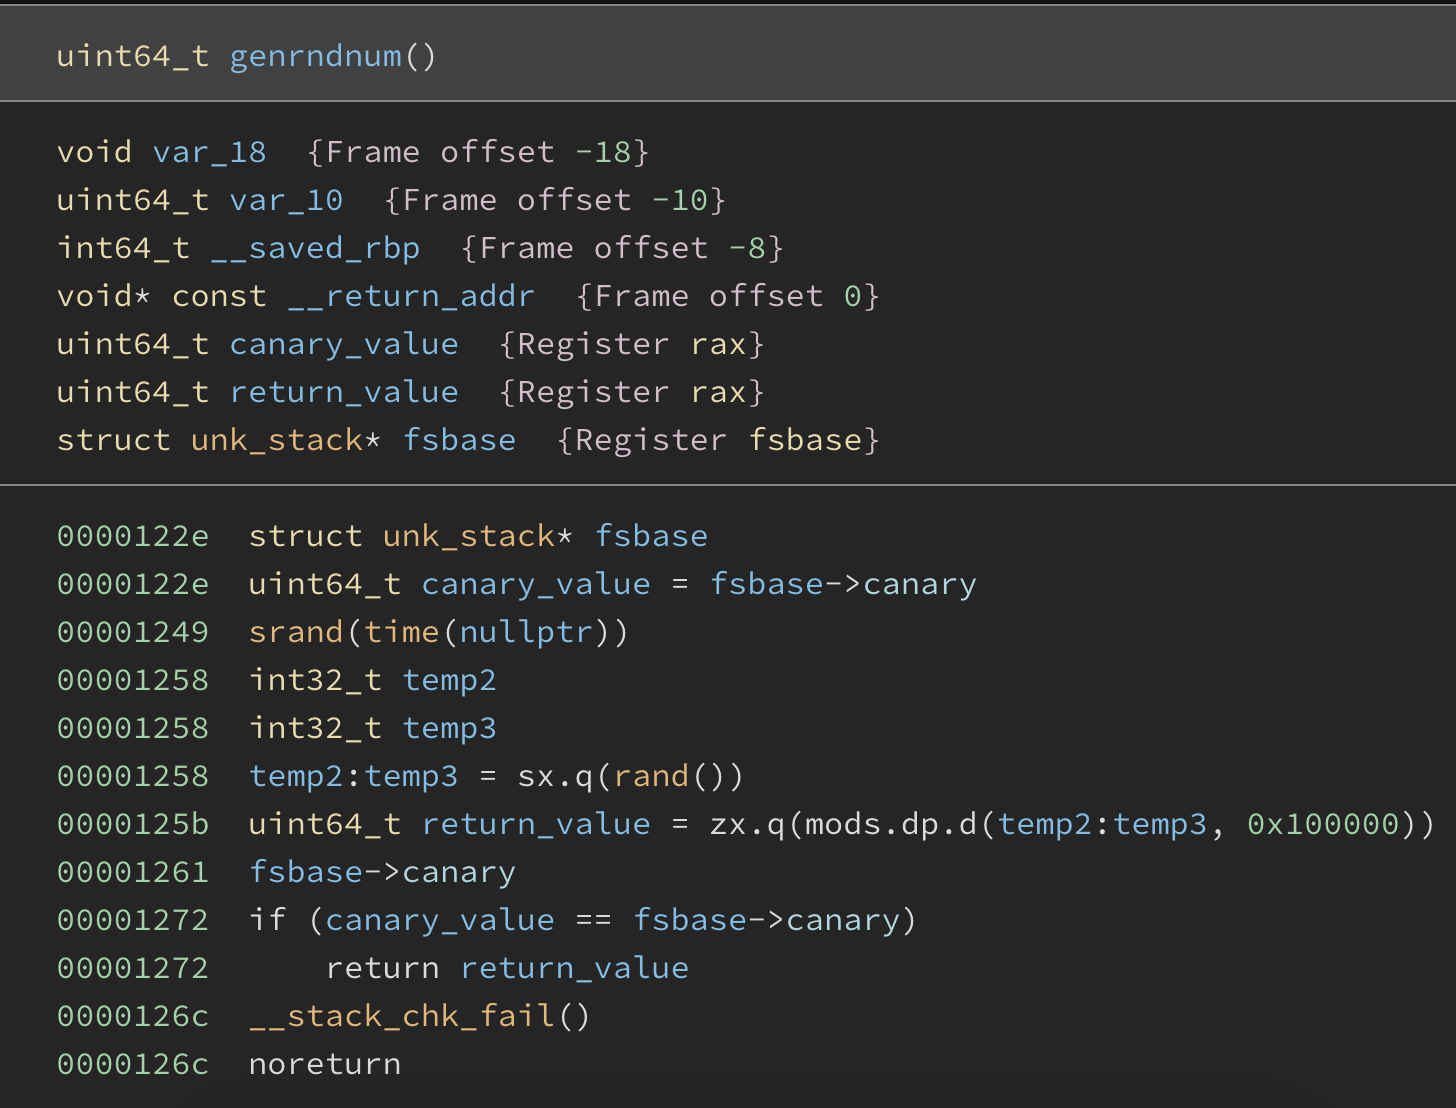
When we look at this function we immediately see that it generates a random number. The thing that takes some searching if you are not familiar with it, is the fact that it sets the seed to the current timestamp by using the ‘time(nullptr)’, thus creating a weakness that if you know when the code is run, you can generate the same random number. Normally, you have to bruteforce a bit before and after the expected time. The last intersting tid bit is the fact that the random number is generated up to a maximum of 100.000 which is the same number used for the for loops to loop through the haystack.
When we rename everything correctly, we can very easily conclude that this challenge consists of:
- Create an int array and fill it with 0xB00
- Generate a random number with a predictable seed
- Use the generated number to set the flag at the array offset indicated by the random number (don’t forget the multiplication by 4)
- Ask the user for input and check if the input is the same as the random number (both in decimal format)
Hope you enjoyed this write up and that you learned something about reversing with Binary Ninja as well.

One thought on “CSAW 2021, binary ninja & a haystack”