Lowering the detection rate of binaries can be done in two mayor ways like we all know:
- modify the binary
- modify the source
The first option one has a lot of articles on the internet covering it, so I’ll not be covering it, maybe in the feature. The second one is also a well known one, but not a often used one imo. A lot of people are either afraid of the source, don’t understand it or think they’ll brake it.
So let’s try and take those fears away, specially since it also requires minimal effort & time which can be a real PITA when you need to pwn a company in a couple of hours. Let’s take shellcodeexec as our first example and directly dive into the whole compiling thing. For the ones wondering what it is, Carnal0wnage has a great writeup on how to use it and what it is. You’ll need a compiler, which luckily for use there are tons of. To keep it simple I’ve used Visual Studio Express 2010. It’s a great IDE & Compiler in one and a lot of source just works. After downloading and installing it, here comes the “hard” part:
- Download the shellcodeexec source
- Extract it
- Doubleclick on “shellcodeexec-master\windows\shellcodeexec\shellcodeexec.vcproj”
- Click “Finish” on the conversion wizard window
- Change Debug to Release
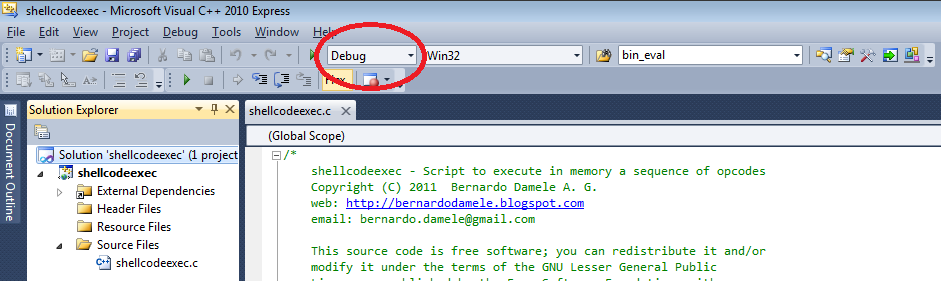
- Then press F7
- The executable appears in the folder “shellcodeexec-master\windows\Release”
So what do you think, was this enough to evade AV? Let’s have a look:
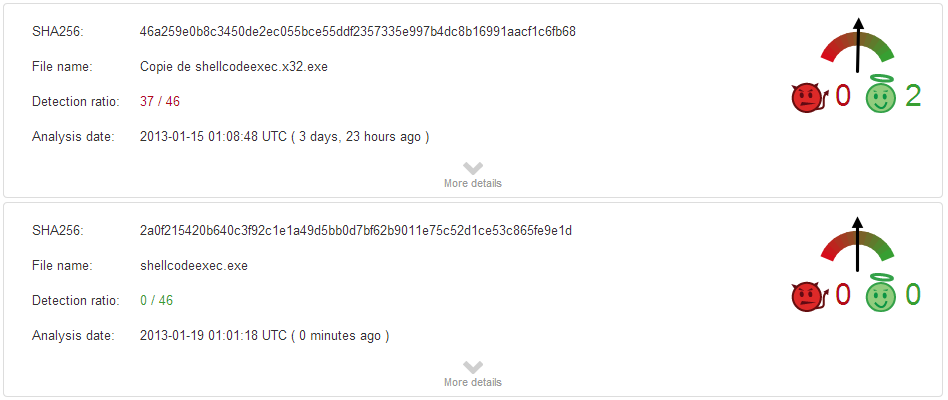
Well that’s fun…a simple recompile lowered the detection rate from 37/46 to 0/46 or to put it simple, it’s now fully undetected. You now might ask, does this always work? Well no, but it sure does lower the detection rates. Let’s have a look at meterpreter for example, what happens when we recompile it?
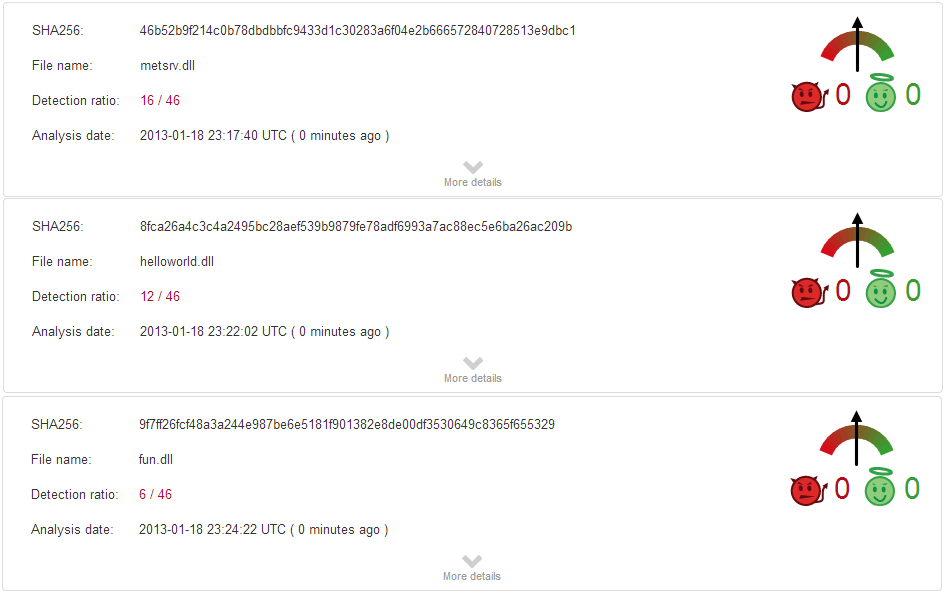
That didn’t exactly go as planned did it? On meterpreter it only accomplished:
- 16/46 (fresh recompile)
- 6/46 (adjusting to speed optimization)
Still if you are looking for an EASY way to lower the detection rate of your tool, this is pretty nice. Besides being easy it also gives you a lot of freedom to just change the code slightly and probably reach that much desired “fully undetected” goal.
Let’s have a quick look on how to compile meterpreter, just to make sure the internet has another reference on the subject.
All the previous steps still apply, but also make sure to unload the project “ext_server_sniffer”, although the answer can also be easily found by searching for the error. This is kinda all it takes to bring it down to the showed 16/46 from the normal 35/46 that meterpreter is rated when being uploaded for analysis. If you want to lower it further you can adjust the optimization options of the compiler. Depending on the project you want to adjust, the meterpreter one is called “metsrv”, right click on it and choose properties –> configuration properties –>c/c++ –> optimization:
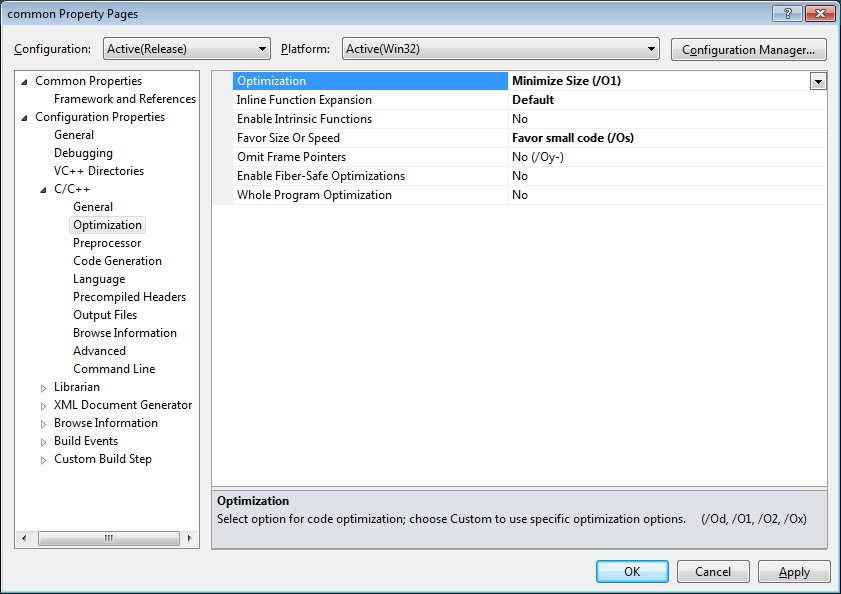
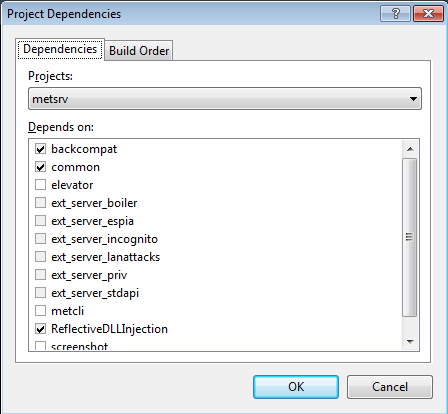
You can play with a lot of them, be careful this is that moment that you can actually break something. I’ve only played with “Optimization” and “Favor size or speed” which was enough to lower the detection rate to 6/46. Sometimes a project also contains dependency which if also modified could lower the detection rate even further. For meterpreter you can view this by right-clicking on the project and choosing “project dependencies”:
We now have accomplished the following with minimal effort & time:
- Make shellcodeexec FUD
- Lower the detection rate of meterpreter drastically
We could try and make meterpreter FUD by changing even more compiler / linker options (or even the source itself), but this would require more testing, clicking, uploading and since I need to catch some sleep, I’ll leave that as an excersize for the reader. Hope you have fun recompiling all kind of tools out there and if you run into errors just copy/paste them into google or bing.
References
- http://carnal0wnage.attackresearch.com/2011/07/process-injection-outside-of-metasploit.html
- https://github.com/inquisb/shellcodeexec
- http://eldeeb.net/wrdprs/?p=71
- https://github.com/rapid7/metasploit-framework/tree/master/external/source/meterpreter
- IRC:// #metasploit on freenode, thanks to the kind people that always hang around there