In one of my last blogs I talked about visualizing firewall data for the purpose of analyzing the configuration and potentially identify security issues. As usual you can skip directly to the tool on my github, or keep on reading.
I wanted to continue playing with this approach to see how it could be improved from a fairly static tool, to a more graph database like approach. However, it turns out that it is somewhat difficult to obtain public firewall configuration files to play with. This is a similar problem to people doing machine learning in cybersecurity where obtaining datasets is still a bit of a challenge.
I decided to write a tool to generate this connection information and at the same time play as well as learn some things which I usually never bother with during development of proof-of-concept projects. So this time I decided to actually document my code, use type annotation and type hints as well as write some unit tests using pytest and actually figure out how argparse sub-commands work.
The tool intends to eventually offer the following options, but for now it only offers the plain option:
python generator_cli.py
usage: generator_cli.py [-h] [--debug] [--verbose] [--config CONFIG] [--mode {inner,outer,all}] {plain,time,apps,full} ...

Generate network connection with a varying level of metadata

options:
  -h, --help            show this help message and exit
  --debug               set debug level
  --verbose             set informational level
  --config CONFIG       Configuration file
  --mode {inner,outer,all}
                        Generate only inner vlan, outer vlan or all connections

Available sub-commands:
  {plain,time,apps,full}
                        Generate connection dataset with different levels of metadata
    plain               Only ip,src,ports
    time                Adds timestamp within desired range
    apps                Adds application details per connection
    full                Generates connections with timestamps & application information

Thanks for giving this a try! --DiabloHorn
The plain option generates the bare minimum of connection information:
{'srchost': '219.64.120.76', 'dsthost': '68.206.89.177', 'srcport': 64878, 'dstport': 3389}
{'srchost': '219.64.120.13', 'dsthost': '68.206.89.162', 'srcport': 63219, 'dstport': 3389}
{'srchost': '92.9.15.58', 'dsthost': '118.220.234.59', 'srcport': 49842, 'dstport': 3389}
{'srchost': '92.9.15.62', 'dsthost': '118.220.234.216', 'srcport': 57969, 'dstport': 445}
The main concept of the tool is that you can define VLAN names and some options and based on that information inner and outer connections for those VLANs are then generated. The --mode parameter controls which type of connections it will generate. The inner mode will only generate connections within the VLAN, the outer mode will generate only connections from the VLAN to other VLANs and the all mode will generate both.
I hope, but don’t promise, to eventually implement the other subcommands time for the generation of connection info within a defined time range (each connection being timestamped) and apps to generate connection info linked to applications like chrome, spotify, etc.
The following set of commands illustrate how you can use this tool to generate pretty pictures with yED
python generator_cli.py plain | jq '[.srchost,.dsthost,.dstport] | join(",")'Which will output something along the lines of this, which after converting to an Excel document you can import with yED:
139.75.237.238,127.17.254.69,389
139.75.237.123,127.17.254.147,389
139.75.237.243,127.17.254.192,80
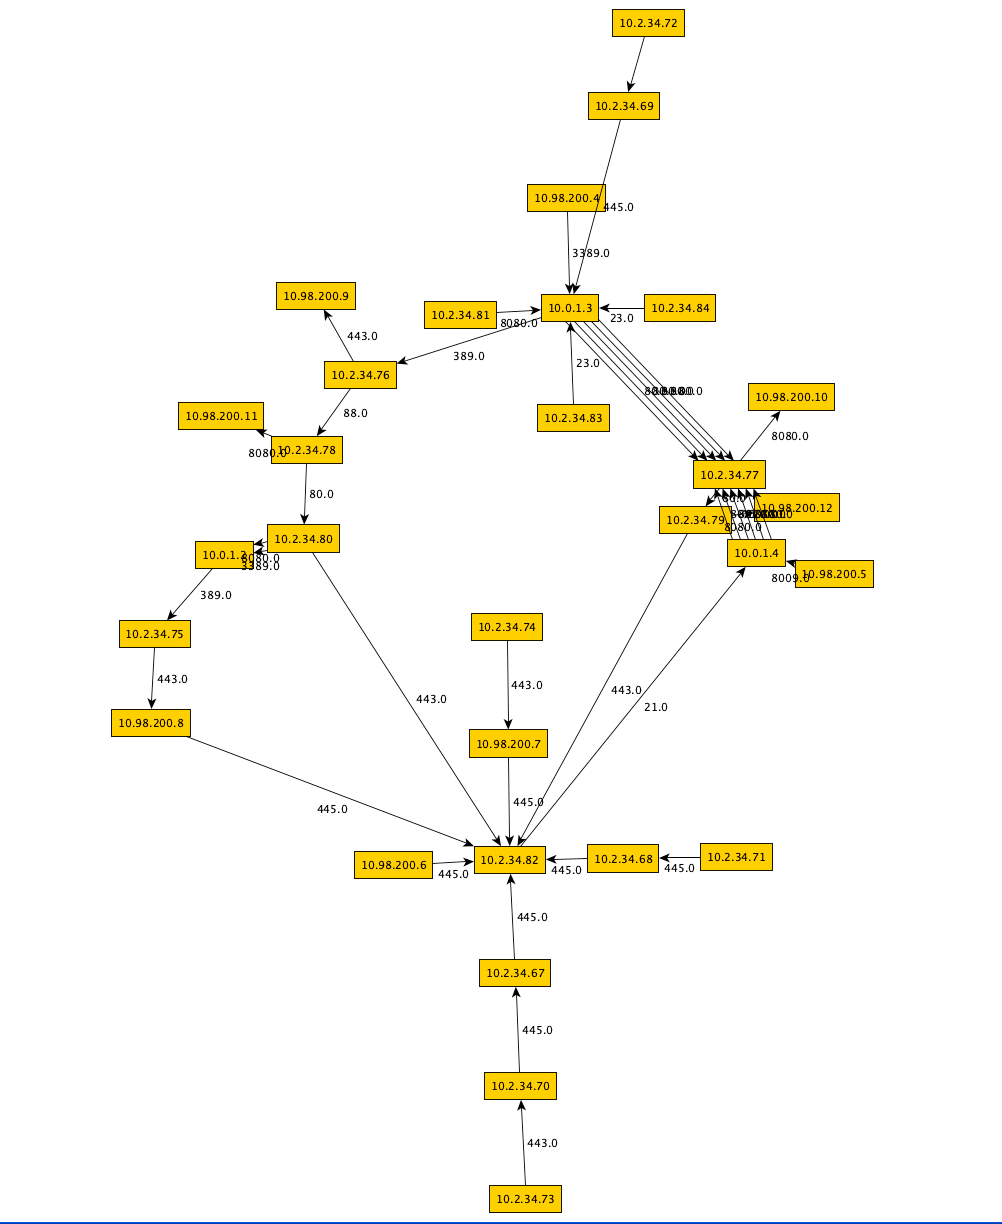
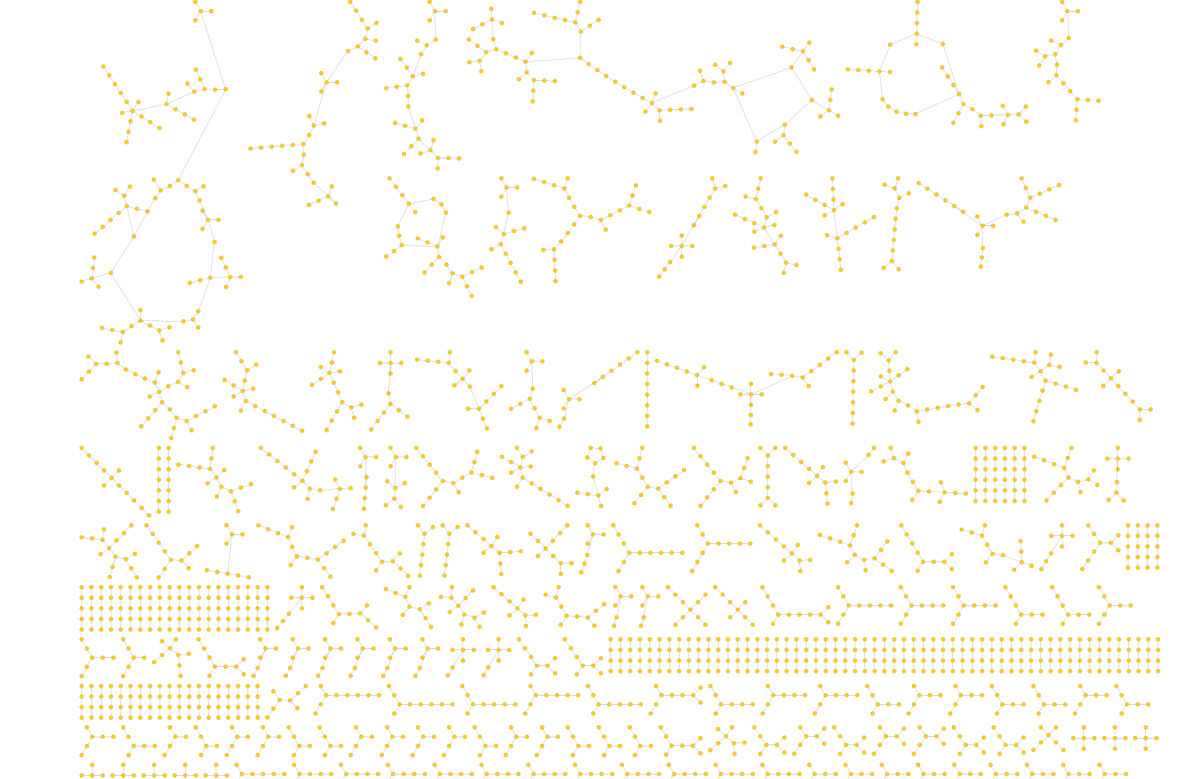
139.75.237.100,127.17.254.149,389The featured image of this blogs shows all of the generated nodes, the following image provides details of one of those generated collection of nodes: